JWT 和 JJWT 的区别?别再傻傻分不清了。。_java-jwt 与jjwt有什么区别-程序员宅基地
技术标签: Java
jwt是什么?
JWTs是JSON对象的编码表示。JSON对象由零或多个名称/值对组成,其中名称为字符串,值为任意JSON值。
JWT有助于在clear(例如在URL中)发送这样的信息,可以被信任为不可读(即加密的)、不可修改的(即签名)和URL - safe(即Base64编码的)。
jwt的组成
- Header: 标题包含了令牌的元数据,并且在最小包含签名和/或加密算法的类型
- Claims: Claims包含您想要签署的任何信息
- JSON Web Signature (JWS): 在header中指定的使用该算法的数字签名和声明
例如:
Header:

{
  "alg": "HS256",
  "typ": "JWT"
}

Claims:

{
  "sub": "1234567890",
  "name": "John Doe",
  "admin": true
}

Signature:

base64UrlEncode(Header) + "." + base64UrlEncode(Claims),
加密生成的token:

如何保证 JWT 安全
有很多库可以帮助您创建和验证JWT,但是当使用JWT时,仍然可以做一些事情来限制您的安全风险。在您信任JWT中的任何信息之前,请始终验证签名。这应该是给定的。
换句话说,如果您正在传递一个秘密签名密钥到验证签名的方法,并且签名算法被设置为“none”,那么它应该失败验证。
确保签名的秘密签名,用于计算和验证签名。秘密签名密钥只能由发行者和消费者访问,不能在这两方之外访问。
不要在JWT中包含任何敏感数据。这些令牌通常是用来防止操作(未加密)的,因此索赔中的数据可以很容易地解码和读取。
如果您担心重播攻击,包括一个nonce(jti索赔)、过期时间(exp索赔)和创建时间(iat索赔)。这些在JWT规范中定义得很好。

jwt的框架:JJWT
JJWT是一个提供端到端的JWT创建和验证的Java库。永远免费和开源(Apache License,版本2.0),JJWT很容易使用和理解。它被设计成一个以建筑为中心的流畅界面,隐藏了它的大部分复杂性。
- JJWT的目标是最容易使用和理解用于在JVM上创建和验证JSON Web令牌(JWTs)的库。
- JJWT是基于JWT、JWS、JWE、JWK和JWA RFC规范的Java实现。
- JJWT还添加了一些不属于规范的便利扩展,比如JWT压缩和索赔强制。
规范兼容:
- 创建和解析明文压缩JWTs
- 创建、解析和验证所有标准JWS算法的数字签名紧凑JWTs(又称JWSs):
- HS256: HMAC using SHA-256
- HS384: HMAC using SHA-384
- HS512: HMAC using SHA-512
- RS256: RSASSA-PKCS-v1_5 using SHA-256
- RS384: RSASSA-PKCS-v1_5 using SHA-384
- RS512: RSASSA-PKCS-v1_5 using SHA-512
- PS256: RSASSA-PSS using SHA-256 and MGF1 with SHA-256
- PS384: RSASSA-PSS using SHA-384 and MGF1 with SHA-384
- PS512: RSASSA-PSS using SHA-512 and MGF1 with SHA-512
- ES256: ECDSA using P-256 and SHA-256
- ES384: ECDSA using P-384 and SHA-384
- ES512: ECDSA using P-521 and SHA-512
这里以github上的demo演示,理解原理,集成到自己项目中即可。
应用采用 spring boot + angular + jwt
结构图

Maven 引进 : pom.xml
<project xmlns="http://maven.apache.org/POM/4.0.0" xmlns:xsi="http://www.w3.org/2001/XMLSchema-instance"
    xsi:schemaLocation="http://maven.apache.org/POM/4.0.0 http://maven.apache.org/xsd/maven-4.0.0.xsd">
    <modelVersion>4.0.0</modelVersion>
    <groupId>com.nibado.example</groupId>
    <artifactId>jwt-angular-spring</artifactId>
    <version>0.0.2-SNAPSHOT</version>
    <properties>
        <maven.compiler.source>1.8</maven.compiler.source>
        <maven.compiler.target>1.8</maven.compiler.target>

        <commons.io.version>2.4</commons.io.version>
        <jjwt.version>0.6.0</jjwt.version>
        <junit.version>4.12</junit.version>
        <spring.boot.version>1.5.3.RELEASE</spring.boot.version>
    </properties>

    <build>
        <plugins>
            <plugin>
                <groupId>org.springframework.boot</groupId>
                <artifactId>spring-boot-maven-plugin</artifactId>
                <version>${spring.boot.version}</version>
                <executions>
                    <execution>
                        <goals>
                            <goal>repackage</goal>
                        </goals>
                    </execution>
                </executions>
            </plugin>
        </plugins>
    </build>

    <dependencies>
        <dependency>
            <groupId>org.springframework.boot</groupId>
            <artifactId>spring-boot-starter-web</artifactId>
            <version>${spring.boot.version}</version>
        </dependency>
        <dependency>
            <groupId>commons-io</groupId>
            <artifactId>commons-io</artifactId>
            <version>${commons.io.version}</version>
        </dependency>
        <dependency>
            <groupId>io.jsonwebtoken</groupId>
            <artifactId>jjwt</artifactId>
            <version>${jjwt.version}</version>
        </dependency>
        <dependency>
            <groupId>junit</groupId>
            <artifactId>junit</artifactId>
            <version>${junit.version}</version>
        </dependency>
    </dependencies>
</project>
WebApplication.java
package com.nibado.example.jwtangspr;

import org.springframework.boot.SpringApplication;
import org.springframework.boot.autoconfigure.EnableAutoConfiguration;
import org.springframework.boot.web.servlet.FilterRegistrationBean;
import org.springframework.context.annotation.Bean;
import org.springframework.context.annotation.ComponentScan;
import org.springframework.context.annotation.Configuration;

@EnableAutoConfiguration
@ComponentScan
@Configuration
public class WebApplication {

    //过滤器
    @Bean
    public FilterRegistrationBean jwtFilter() {
        final FilterRegistrationBean registrationBean = new FilterRegistrationBean();
        registrationBean.setFilter(new JwtFilter());
        registrationBean.addUrlPatterns("/api/*");
        return registrationBean;
    }

    public static void main(final String[] args) throws Exception {
        SpringApplication.run(WebApplication.class, args);
    }

}
JwtFilter.java
package com.nibado.example.jwtangspr;

import java.io.IOException;

import javax.servlet.FilterChain;
import javax.servlet.ServletException;
import javax.servlet.ServletRequest;
import javax.servlet.ServletResponse;
import javax.servlet.http.HttpServletRequest;

import org.springframework.web.filter.GenericFilterBean;

import io.jsonwebtoken.Claims;
import io.jsonwebtoken.Jwts;
import io.jsonwebtoken.SignatureException;

public class JwtFilter extends GenericFilterBean {

    @Override
    public void doFilter(final ServletRequest req,
                         final ServletResponse res,
                         final FilterChain chain) throws IOException, ServletException {
        final HttpServletRequest request = (HttpServletRequest) req;

        //客户端将token封装在请求头中,格式为(Bearer后加空格):Authorization:Bearer +token
        final String authHeader = request.getHeader("Authorization");
        if (authHeader == null || !authHeader.startsWith("Bearer ")) {
            throw new ServletException("Missing or invalid Authorization header.");
        }

        //去除Bearer 后部分
        final String token = authHeader.substring(7);

        try {
         //解密token,拿到里面的对象claims
            final Claims claims = Jwts.parser().setSigningKey("secretkey")
                .parseClaimsJws(token).getBody();
            //将对象传递给下一个请求
            request.setAttribute("claims", claims);
        }
        catch (final SignatureException e) {
            throw new ServletException("Invalid token.");
        }

        chain.doFilter(req, res);
    }

}
UserController.java
package com.nibado.example.jwtangspr;

import java.util.Arrays;
import java.util.Date;
import java.util.HashMap;
import java.util.List;
import java.util.Map;

import javax.servlet.ServletException;

import org.springframework.web.bind.annotation.RequestBody;
import org.springframework.web.bind.annotation.RequestMapping;
import org.springframework.web.bind.annotation.RequestMethod;
import org.springframework.web.bind.annotation.RestController;

import io.jsonwebtoken.Jwts;
import io.jsonwebtoken.SignatureAlgorithm;

@RestController
@RequestMapping("/user")
public class UserController {

 //这里模拟数据库
    private final Map<String, List<String>> userDb = new HashMap<>();

    @SuppressWarnings("unused")
    private static class UserLogin {
        public String name;
        public String password;
    }

    public UserController() {
        userDb.put("tom", Arrays.asList("user"));
        userDb.put("wen", Arrays.asList("user", "admin"));
    }
    /*以上是模拟数据库,并往数据库插入tom和sally两条记录*/


    @RequestMapping(value = "login", method = RequestMethod.POST)
    public LoginResponse login(@RequestBody final UserLogin login)
        throws ServletException {
        if (login.name == null || !userDb.containsKey(login.name)) {
            throw new ServletException("Invalid login");
        }

        //加密生成token
        return new LoginResponse(Jwts.builder().setSubject(login.name)
            .claim("roles", userDb.get(login.name)).setIssuedAt(new Date())
            .signWith(SignatureAlgorithm.HS256, "secretkey").compact());
    }

    @SuppressWarnings("unused")
    private static class LoginResponse {
        public String token;

        public LoginResponse(final String token) {
            this.token = token;
        }
    }
}
ApiController.java
package com.nibado.example.jwtangspr;

import io.jsonwebtoken.Claims;

import java.util.List;

import javax.servlet.ServletException;
import javax.servlet.http.HttpServletRequest;

import org.springframework.web.bind.annotation.PathVariable;
import org.springframework.web.bind.annotation.RequestMapping;
import org.springframework.web.bind.annotation.RequestMethod;
import org.springframework.web.bind.annotation.RestController;

@RestController
@RequestMapping("/api")
public class ApiController {
 @SuppressWarnings("unchecked")
 @RequestMapping(value = "role/{role}", method = RequestMethod.GET)
 public Boolean login(@PathVariable final String role,
   final HttpServletRequest request) throws ServletException {
  final Claims claims = (Claims) request.getAttribute("claims");
  return ((List<String>) claims.get("roles")).contains(role);
 }
}
index.html
<!doctype html>
<html ng-app="myApp">
<head>
    <meta charset="utf-8"/>
    <meta http-equiv="X-UA-Compatible" content="IE=edge,chrome=1"/>
    <title>JSON Web Token / AngularJS / Spring Boot example</title>
    <meta name="description" content="">
    <meta name="viewport" content="width=device-width">
    <link rel="stylesheet" href="libs/bootstrap/css/bootstrap.css">
    <script src="libs/jquery/jquery.js"></script>
    <script src="libs/bootstrap/js/bootstrap.js"></script>
    <script src="libs/angular/angular.js"></script>
    <script src="app.js"></script>
</head>
<body>
<div class="container" ng-controller='MainCtrl'>
 <h1>{
   {greeting}}</h1>
 <div ng-show="!loggedIn()">
  Please log in (tom and sally are valid names)</br>
  <form ng-submit="login()">
   Username: <input type="text" ng-model="userName"/><span><input type="submit" value="Login"/>
  </form>
 </div>
 <div class="alert alert-danger" role="alert" ng-show="error.data.message">
   <span class="glyphicon glyphicon-exclamation-sign" aria-hidden="true"></span>
   <span class="sr-only">Error:</span>
   {
   {error.data.message}}
 </div>
 <div ng-show="loggedIn()">
  <div class="row">
   <div class="col-md-6">
    <h3><span class="label label-success">Success!</span> Welcome {
   {userName}}</h3>
     <a href ng-click="logout()">(logout)</a>
   </div>
   <div class="col-md-4">
   <div class="row header">
   <div class="col-sm-4">{
   {userName}} is a</div>
  </div>
  <div class="row">
   <div class="col-sm-2">User</div>
   <div class="col-sm-2"><span class="glyphicon glyphicon-ok" aria-hidden="true" ng-show="roleUser"></span></div>
  </div>
  <div class="row">
   <div class="col-sm-2">Admin</div>
   <div class="col-sm-2"><span class="glyphicon glyphicon-ok" aria-hidden="true" ng-show="roleAdmin"></span></div>
  </div>
  <div class="row">
   <div class="col-sm-2">Foo</div>
   <div class="col-sm-2"><span class="glyphicon glyphicon-ok" aria-hidden="true" ng-show="roleFoo"></span></div>
  </div>
   </div>
  </div>
 </div>
</div>
</body>
</html>
app.js
var appModule = angular.module('myApp', []);

appModule.controller('MainCtrl', ['mainService','$scope','$http',
        function(mainService, $scope, $http) {
            $scope.greeting = 'Welcome to the JSON Web Token / AngularJR / Spring example!';
            $scope.token = null;
            $scope.error = null;
            $scope.roleUser = false;
            $scope.roleAdmin = false;
            $scope.roleFoo = false;

            $scope.login = function() {
                $scope.error = null;
                mainService.login($scope.userName).then(function(token) {
                    $scope.token = token;
                    $http.defaults.headers.common.Authorization = 'Bearer ' + token;
                    $scope.checkRoles();
                },
                function(error){
                    $scope.error = error
                    $scope.userName = '';
                });
            }

            $scope.checkRoles = function() {
                mainService.hasRole('user').then(function(user) {$scope.roleUser = user});
                mainService.hasRole('admin').then(function(admin) {$scope.roleAdmin = admin});
                mainService.hasRole('foo').then(function(foo) {$scope.roleFoo = foo});
            }

            $scope.logout = function() {
                $scope.userName = '';
                $scope.token = null;
                $http.defaults.headers.common.Authorization = '';
            }

            $scope.loggedIn = function() {
                return $scope.token !== null;
            }
        } ]);


appModule.service('mainService', function($http) {
    return {
        login : function(username) {
            return $http.post('/user/login', {name: username}).then(function(response) {
                return response.data.token;
            });
        },

        hasRole : function(role) {
            return $http.get('/api/role/' + role).then(function(response){
                console.log(response);
                return response.data;
            });
        }
    };
});
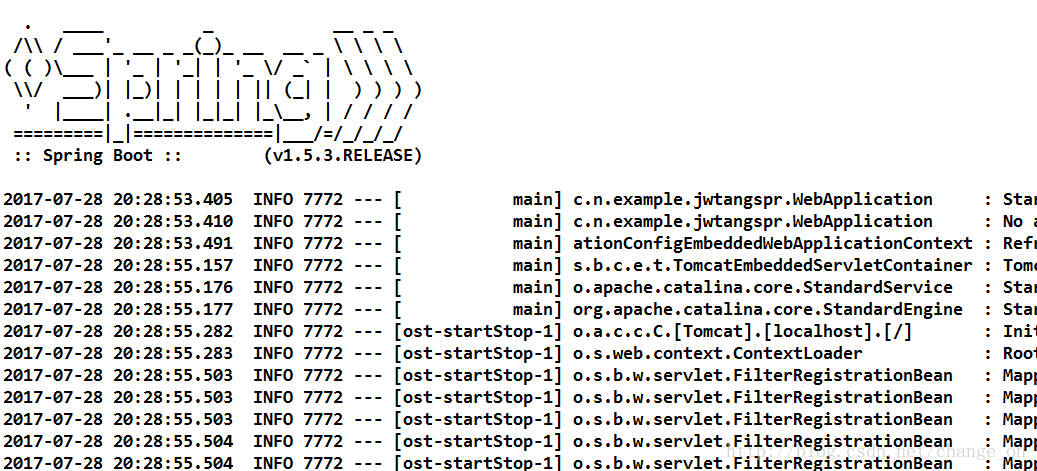
运行应用

效果


原文链接:https://blog.csdn.net/change_on/article/details/76279441
版权声明:本文为CSDN博主「J_小浩子」的原创文章,遵循CC 4.0 BY-SA版权协议,转载请附上原文出处链接及本声明。
近期热文推荐:
1.1,000+ 道 Java面试题及答案整理(2021最新版)
2.别在再满屏的 if/ else 了,试试策略模式,真香!!
3.卧槽!Java 中的 xx ≠ null 是什么新语法?
4.Spring Boot 2.5 重磅发布,黑暗模式太炸了!
觉得不错,别忘了随手点赞+转发哦!
智能推荐
oracle 12c 集群安装后的检查_12c查看crs状态-程序员宅基地
文章浏览阅读1.6k次。安装配置gi、安装数据库软件、dbca建库见下:http://blog.csdn.net/kadwf123/article/details/784299611、检查集群节点及状态:[root@rac2 ~]# olsnodes -srac1 Activerac2 Activerac3 Activerac4 Active[root@rac2 ~]_12c查看crs状态
解决jupyter notebook无法找到虚拟环境的问题_jupyter没有pytorch环境-程序员宅基地
文章浏览阅读1.3w次,点赞45次,收藏99次。我个人用的是anaconda3的一个python集成环境,自带jupyter notebook,但在我打开jupyter notebook界面后,却找不到对应的虚拟环境,原来是jupyter notebook只是通用于下载anaconda时自带的环境,其他环境要想使用必须手动下载一些库:1.首先进入到自己创建的虚拟环境(pytorch是虚拟环境的名字)activate pytorch2.在该环境下下载这个库conda install ipykernelconda install nb__jupyter没有pytorch环境
国内安装scoop的保姆教程_scoop-cn-程序员宅基地
文章浏览阅读5.2k次,点赞19次,收藏28次。选择scoop纯属意外,也是无奈,因为电脑用户被锁了管理员权限,所有exe安装程序都无法安装,只可以用绿色软件,最后被我发现scoop,省去了到处下载XXX绿色版的烦恼,当然scoop里需要管理员权限的软件也跟我无缘了(譬如everything)。推荐添加dorado这个bucket镜像,里面很多中文软件,但是部分国外的软件下载地址在github,可能无法下载。以上两个是官方bucket的国内镜像,所有软件建议优先从这里下载。上面可以看到很多bucket以及软件数。如果官网登陆不了可以试一下以下方式。_scoop-cn
Element ui colorpicker在Vue中的使用_vue el-color-picker-程序员宅基地
文章浏览阅读4.5k次,点赞2次,收藏3次。首先要有一个color-picker组件 <el-color-picker v-model="headcolor"></el-color-picker>在data里面data() { return {headcolor: ’ #278add ’ //这里可以选择一个默认的颜色} }然后在你想要改变颜色的地方用v-bind绑定就好了,例如:这里的:sty..._vue el-color-picker
迅为iTOP-4412精英版之烧写内核移植后的镜像_exynos 4412 刷机-程序员宅基地
文章浏览阅读640次。基于芯片日益增长的问题,所以内核开发者们引入了新的方法,就是在内核中只保留函数,而数据则不包含,由用户(应用程序员)自己把数据按照规定的格式编写,并放在约定的地方,为了不占用过多的内存,还要求数据以根精简的方式编写。boot启动时,传参给内核,告诉内核设备树文件和kernel的位置,内核启动时根据地址去找到设备树文件,再利用专用的编译器去反编译dtb文件,将dtb还原成数据结构,以供驱动的函数去调用。firmware是三星的一个固件的设备信息,因为找不到固件,所以内核启动不成功。_exynos 4412 刷机
Linux系统配置jdk_linux配置jdk-程序员宅基地
文章浏览阅读2w次,点赞24次,收藏42次。Linux系统配置jdkLinux学习教程,Linux入门教程(超详细)_linux配置jdk
随便推点
matlab(4):特殊符号的输入_matlab微米怎么输入-程序员宅基地
文章浏览阅读3.3k次,点赞5次,收藏19次。xlabel('\delta');ylabel('AUC');具体符号的对照表参照下图:_matlab微米怎么输入
C语言程序设计-文件(打开与关闭、顺序、二进制读写)-程序员宅基地
文章浏览阅读119次。顺序读写指的是按照文件中数据的顺序进行读取或写入。对于文本文件,可以使用fgets、fputs、fscanf、fprintf等函数进行顺序读写。在C语言中,对文件的操作通常涉及文件的打开、读写以及关闭。文件的打开使用fopen函数,而关闭则使用fclose函数。在C语言中,可以使用fread和fwrite函数进行二进制读写。 Biaoge 于2024-03-09 23:51发布 阅读量:7 ️文章类型:【 C语言程序设计 】在C语言中,用于打开文件的函数是____,用于关闭文件的函数是____。
Touchdesigner自学笔记之三_touchdesigner怎么让一个模型跟着鼠标移动-程序员宅基地
文章浏览阅读3.4k次,点赞2次,收藏13次。跟随鼠标移动的粒子以grid(SOP)为partical(SOP)的资源模板,调整后连接【Geo组合+point spirit(MAT)】,在连接【feedback组合】适当调整。影响粒子动态的节点【metaball(SOP)+force(SOP)】添加mouse in(CHOP)鼠标位置到metaball的坐标,实现鼠标影响。..._touchdesigner怎么让一个模型跟着鼠标移动
【附源码】基于java的校园停车场管理系统的设计与实现61m0e9计算机毕设SSM_基于java技术的停车场管理系统实现与设计-程序员宅基地
文章浏览阅读178次。项目运行环境配置:Jdk1.8 + Tomcat7.0 + Mysql + HBuilderX(Webstorm也行)+ Eclispe(IntelliJ IDEA,Eclispe,MyEclispe,Sts都支持)。项目技术:Springboot + mybatis + Maven +mysql5.7或8.0+html+css+js等等组成,B/S模式 + Maven管理等等。环境需要1.运行环境:最好是java jdk 1.8,我们在这个平台上运行的。其他版本理论上也可以。_基于java技术的停车场管理系统实现与设计
Android系统播放器MediaPlayer源码分析_android多媒体播放源码分析 时序图-程序员宅基地
文章浏览阅读3.5k次。前言对于MediaPlayer播放器的源码分析内容相对来说比较多,会从Java-&amp;gt;Jni-&amp;gt;C/C++慢慢分析,后面会慢慢更新。另外,博客只作为自己学习记录的一种方式,对于其他的不过多的评论。MediaPlayerDemopublic class MainActivity extends AppCompatActivity implements SurfaceHolder.Cal..._android多媒体播放源码分析 时序图
java 数据结构与算法 ——快速排序法-程序员宅基地
文章浏览阅读2.4k次,点赞41次,收藏13次。java 数据结构与算法 ——快速排序法_快速排序法